
From Seed to Sprout: Creating a Vibrant Herb Garden
Posted on 24/08/2025
From Seed to Sprout: Creating a Vibrant Herb Garden
Are you fascinated by the idea of plucking fresh basil leaves for your pasta dish or adorning your windowsill with aromatic rosemary? Growing your own herb garden is more rewarding--and easier--than you might think. This all-inclusive guide will provide you with everything you need to know to grow a thriving, lush herb garden from seed to sprout. Whether your passion is savory cooking, crafting herbal teas, or simply enjoying natural greenery, you'll find the right tips and advice to create a vibrant herb garden that flourishes indoors or outdoors.
Why Start a Home Herb Garden?
Herbs are more than just flavorful additions to your favorite recipes. Cultivating a vibrant herb garden at home offers an abundance of benefits, such as:
- Freshness at your fingertips: Enjoy immediate access to pesticide-free herbs any time you need them.
- Cost savings: Buy fewer expensive store-bought herbs by harvesting your own crop throughout the season.
- Healthier meals: Add nutrition and flavor without excess salt or fat by using fresh herbs.
- Sustainability and mindfulness: Reduce plastic packaging waste and cultivate a deeper connection to your food.
- Beautification: An herb garden can serve as a lovely decorative accent on a windowsill, balcony, or yard.
- Therapeutic effect: Gardening is proven to alleviate stress and promote overall well-being.
Now, let's walk through how to create your own beautiful herb oasis from the ground up.
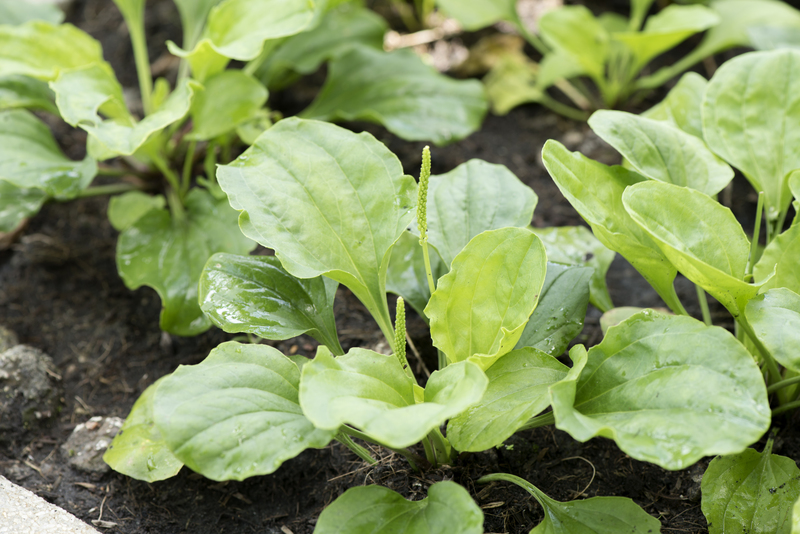
Step 1: Choosing the Right Herbs for Your Garden
The first question new gardeners often ask is, "Which herbs should I grow?" The answer depends on your culinary interests, growing space, and climate. Consider starting with these popular and easy-to-grow herbs:
- Basil - Essential for Italian dishes, pesto, and salads.
- Mint - Refreshing for teas, cocktails, and desserts; invasive, so pot separately.
- Parsley - A versatile garnish and nutrient powerhouse.
- Thyme - Perfect for Mediterranean recipes and roasted vegetables.
- Cilantro - For Mexican, Indian, and Asian cuisine.
- Chives - Mild onion flavor great for salads and soups.
- Rosemary - Woody herb that enriches meats and potatoes.
- Dill - For pickling, seafood, and Scandinavian cuisine.
Pro Tip: If you're just starting your kitchen garden, focus on 3-5 herbs you use most frequently. Once you're comfortable with these, expand your horizons and experiment with less common varieties like tarragon, sage, or lemon verbena.
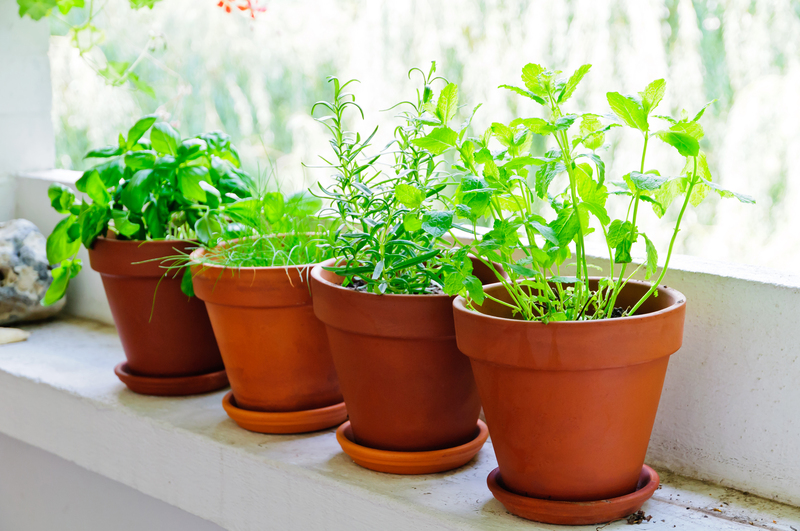
Step 2: Selecting the Perfect Location for Your Herb Garden
Creating a vibrant herb garden begins with choosing the ideal spot. Herbs love sunlight, so aim for at least 6 hours of direct sun each day. Here are some ideal locations:
- Sunny windowsill - Great for apartment dwellers. South or west-facing windows provide optimal light.
- Balcony or patio - Use containers for versatility and easy access.
- Outdoor beds or raised planters - For those with yard space, herbs can thrive alongside flowers or vegetables.
- Vertical gardens - Make the most of limited spaces by using vertical planters or wall-hanging pockets.
Soil quality and drainage are also vital. Choose a well-draining, nutrient-rich potting mix if using containers. In garden beds, amend soil with compost to ensure it's crumbly and fertile. Avoid water-logged soil--most herbs detest sitting with their roots in water.
Step 3: Gathering Supplies for a Thriving Herb Garden
Having the right tools and materials streamlines the growing process. Here's a checklist for starting your herb garden from seed to sprout:
- Containers or pots (with drainage holes)
- Quality potting mix or garden soil (herb-specific blends are also available)
- Herb seeds or starter plants
- Watering can or spray bottle
- Small hand spade or trowel
- Plant markers (optional but helpful for beginners)
- Compost or slow-release organic fertilizer
- Mulch (to conserve moisture and suppress weeds, especially outdoors)
Did you know? Many seed kits are available with curated selections of culinary herbs--perfect for beginners.
Step 4: Sowing Your Herb Seeds--A Step-by-Step Guide
1. Read the Seed Packet Instructions
Every herb has specific requirements for depth, spacing, and light. Always check the seed packet before planting.
2. Prepare Your Containers or Garden Bed
Fill your pots with moist, quality potting mix up to an inch below the rim. For garden soil, rake to create a smooth, even surface.
3. Sow the Seeds
- Tiny seeds (like basil, oregano, thyme): Sprinkle gently on the surface and barely cover with a thin layer of soil.
- Larger seeds (like cilantro, dill, parsley): Plant at the recommended depth, usually about 1/4 to 1/2 inch deep.
4. Water Wisely
After sowing, use a spray bottle or gentle watering can to moisten the soil, being careful not to wash away delicate seeds.
5. Cover and Wait
Cover containers with plastic wrap or a clear lid to create a mini-greenhouse effect for warmth and humidity. Remove once seeds sprout.
6. Watch for Sprouting
Most herbs germinate in 7-21 days. Maintain consistent moisture and provide plenty of light for the best results.
Step 5: Growing and Nurturing Your Seedlings
Once your seeds have sprouted, give your seedlings the best start in life:
- Light: Place seedlings in a bright location. If natural light is insufficient, consider a grow light.
- Water: Moisten when the top inch of soil feels dry. Try not to overwater--herbs don't like soggy roots.
- Airflow: Good ventilation prevents disease and mold. A small fan can help if growing indoors.
- Thinning: If multiple seedlings pop up in one spot, gently thin them to avoid crowding. Use scissors to snip the weakest at soil level.
Pro Tip: Gradually accustom young plants to outdoor conditions ("hardening off") before transplanting outdoors.
Step 6: Transplanting and Arranging Your Herb Garden
Once your seedlings are a few inches tall and have several sets of true leaves, it's time to move them to their final destination.
- Outdoor beds: Wait until any chance of frost is past. Space herbs according to recommendations (usually 8-18 inches apart).
- Containers: Use at least 6-inch-deep pots, one per herb, or a larger trough for several with similar needs.
- Group herbs by water needs: For example, keep rosemary and sage in drier soil; basil and parsley prefer more moisture.
Water thoroughly after transplanting, and mulch outdoor beds to retain moisture and prevent weeds.
Step 7: Caring for and Maintaining Your Vibrant Herb Garden
Consistent care ensures your herb garden thrives from seed to sprout and beyond. Follow these essential maintenance practices:
Watering
- Check daily, especially during hot weather or if indoors near heat sources.
- Water the soil, not the leaves, to minimize disease.
- Reduce watering in winter; herbs need less moisture during dormancy.
Feeding
- Herbs are generally light feeders. Use diluted, balanced fertilizer every 4-6 weeks or top dress with compost.
- Avoid over-fertilization as it can reduce essential oil content, which gives herbs their distinctive flavors.
Pruning and Harvesting
- Regular harvesting encourages bushier, more productive plants.
- Pinch back the tips of basil, mint, and oregano to prevent them from flowering too early.
- When herbs begin to flower, their flavor can decline. Pinch off flower buds unless you want to attract pollinators or collect seeds.
Pest and Disease Control
- Check leaves for aphids, spider mites, and whiteflies.
- Use organic methods like insecticidal soap, neem oil, or introducing beneficial insects.
- Good air circulation and careful watering will help prevent fungal diseases like powdery mildew.
Step 8: Preserving and Using Your Homegrown Herbs
The culinary adventures don't end when you start harvesting! There are endless ways to use your homegrown herbs:
- Fresh: Add to salads, sauces, marinades, teas, and more.
- Dry: Hang bunches upside-down in a dry, airy room; store the dried leaves in airtight jars.
- Freeze: Chop and freeze in ice cube trays with olive oil or water.
- Herb butters, vinegars, and oils: Infuse your favorite recipes with homemade herbal flavors.
- Medicinal uses: Many herbs have traditional wellness benefits; research mint, chamomile, and lavender for inspiration.
Best Practices for a Flourishing Herb Patch
- Rotate plants yearly to reduce pest build-up in soil beds.
- Label plants--especially varieties that resemble each other, such as oregano and marjoram.
- Succession planting: Sow new seeds every few weeks during the growing season for continuous harvests.
- Mix herbs with flowers or vegetables to enhance your garden's beauty and encourage beneficial insects.
Common Problems & Solutions in Herb Gardening
- Yellowing leaves: Often a sign of overwatering or poor drainage--let soil dry before rewatering.
- Spindly growth: Increase light exposure or thin seedlings.
- No germination: Check seed viability and soil temperature; most herbs germinate best between 65-75?F (18-24?C).
- Bitter taste: Usually from late-season harvesting or flowering--harvest regularly and early.
Design Ideas for a Stunning Herb Display
Herb gardens don't have to be purely functional--they can be breathtakingly beautiful too! Consider these creative arrangements:
- Windowsill herb garden: Use matching pots or vintage teacups.
- Tiered planter: Maximize vertical space with stacked containers.
- Spiral garden: Construct a raised spiral bed to showcase many herbs in a small space.
- Hanging baskets: Display cascading herbs like thyme and oregano.
- Pallete wall garden: Upcycle an old wooden pallet into a vertical herb planter.
Mix colors and textures: Combine broad-leafed basil with fine, grassy chives or silvery thyme for visual appeal.
Troubleshooting Tips for New Herb Gardeners
- If herbs aren't thriving, check:
- Amount and quality of light
- Soil drainage and texture
- Watering frequency
- Container size and root space
- Temperature fluctuations
- Record your successes and failures in a garden journal for next season's improvements.
Conclusion: Grow, Enjoy, and Share Your Vibrant Herb Patch
From seed to sprout, creating a vibrant herb garden is within your reach! With a little effort and care, you'll soon be enjoying the unmatched flavor and fragrance of your homegrown herbs. Whether you opt for a sunny kitchen windowsill, a decorative outdoor bed, or a creative vertical planter, herbs offer endless possibilities for enhancing your meals, your well-being, and your home environment.
Ready to start your own luscious herb haven? Gather your supplies, pick your favorite varieties, and watch as tiny seeds transform into aromatic, bountiful plants. With this comprehensive guide, you're prepared for every step of the journey--all that's left is to plant, nurture, harvest, and savor the results.
Happy gardening!
```Latest Posts
Organic Waste: A Gateway to Fertile Earth
How Your Backyard Can Help Fight Climate Change
Why Container Gardening is Perfect for Beginners
